In this article, we will introduce the wood painting art, Where you can find everything you need to know about wood painting art.
We will explain the steps for painting on the wood step by step. I also introduce a painting method on the wood to create three-dimensional works.
With this beautiful art, you will also be able to make your home decoration more beautiful. In addition, you can use useless wood as a decorative object.
You can just make a beautiful decorative gadget by using the right tools and learn the wood painting art, S
Introducing Wood Painting Art
History
Historical documents show that painting on wood has been very common in the past. But since the wood has little resistance to natural factors, most of these wooden pictures are gone.
One of the oldest antique wooden paintings is the Tomb of Tatar in Afyonkarahisar of Turkey, which is about 2500 years old! Just wow!
This sample is one of the thousands of early paintings on the wood. Maybe the first paintings on the wood have been created by
Lichtenberg Wood Burning eBook
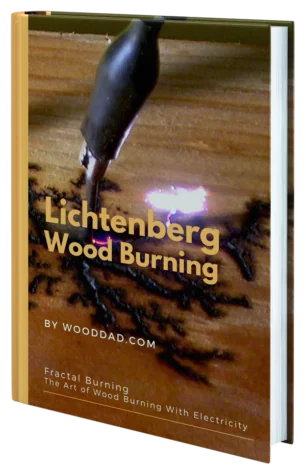
Download Lichtenberg Wood Burning eBook
One of the modern techniques for creating wooden artwork is called Lichtenberg wood Burning. In this eBook, we are going to introduce this newfound art to you.
This technique is known with some different names such as Lichtenberg wood burning, fractal wood burning, and electricity wood art.
This technique should not be confused with wood burning art or pyrography. The art of pyrography on wood is the art of creating motifs and designs by burning with hot metal tools on objects such as wooden surfaces.
Lichtenberg burning is a wood-burning technique for creating designs with electricity.
This eBook is a comprehensive guide on Lichtenberg Wood Burning. All you need to know for Lichtenberg Wood Burning is here.
This is a limited-time offer, order now to get access to the future eBook releases.
Definition
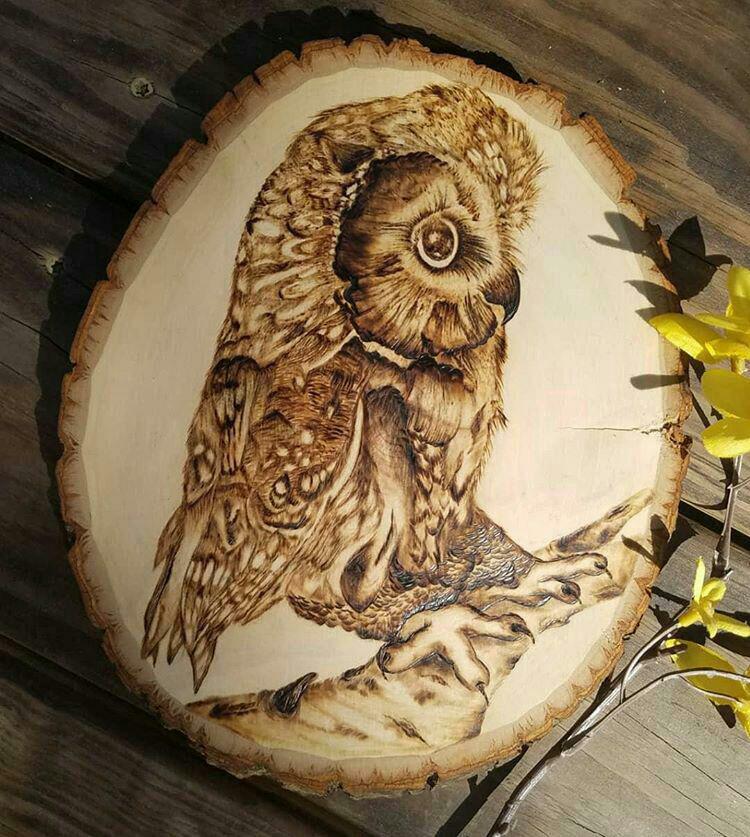
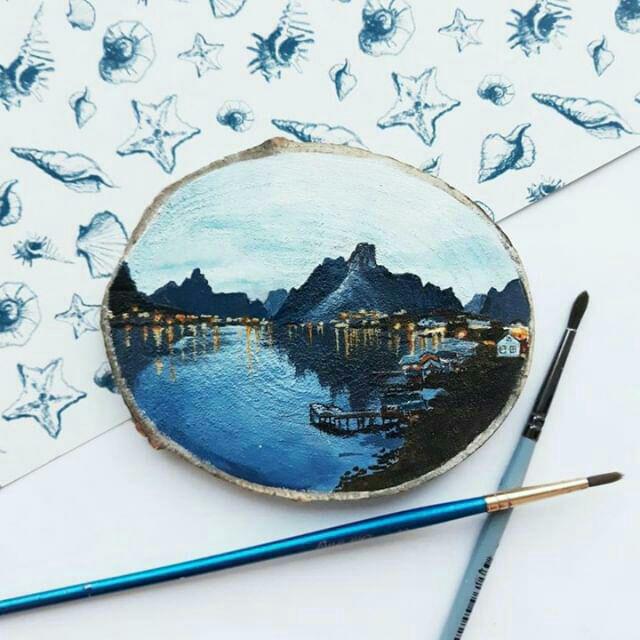
Wood painting art is an art in which the painter uses paint to create a picture on the wooden objects.
This art is being made in many ways, but usually, the artist uses a paintbrush and paint on a flat wooden panel to display a design.
The main theme of the painting on the wood is usually inspired by nature. Things like the sea, trees, animals, habitats, and geometric shapes are the most commonly used nature ideas in wood painting topics.
Required Tools For Wood Painting Art
- Paint or Wood stain
- Paintbrush (Paintbrushes) or pistol pens
- Power sander or sandpaper
- Sticky tack cloth
- Wooden objects
- Shellac (sealer)
Steps To Painting On The Wood
In general, there are two basic steps in this art.
Step 1 – Priming and Sanding
Priming
The surface of the wood should be primed in accordance with the chosen color so that all of its toughness, cracks, and holes are flattened.
Sanding
In this section, we sand the whole surface of the wood so that there is no extra layer on the surface of the wood and cover the cracks.
You can use electric scrubbing to quickly save both time and energy and improve the result.
Step 2 – Painting
Often, the paint is done in two parts:
The first step is basic and is done by using a variety of tools such as brushes.
The first painting is with a general purpose, and you have to paint all the woody parts so that the final color quality will be excellent.
In the second step, you can paint the original design with details.
Wood Painting Art Instructions, Step By Step
Typically, there are different steps of wood painting that are similar for different types of stains and should be executed in sequence.
The paint quality on the wood or any other texture depends on the exact execution of all these steps. These steps include:
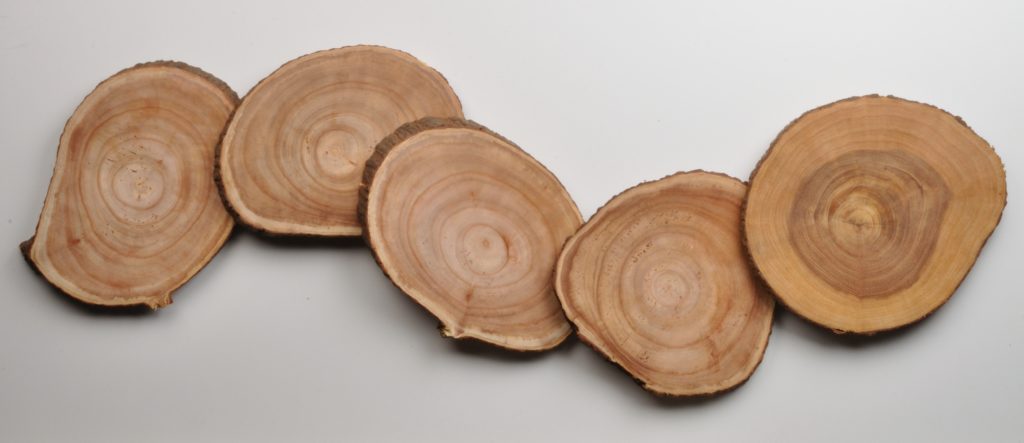
Step 1 – Choosing a Wood
You can draw on any wood surface you like, although some are a bit easier to draw on than others.
It would be more convenient to use woods with minimal grain, especially if you want your drawing to be detailed.
Grain can cause your lines to be bumpy while a wood with little grain allows you to draw more precise and definite lines.
Step 2 – Preparing The Wood Surface
It’s ideal to draw on a smooth and sanded surface. For doing this you can use some sandpaper which is not too coarse, on all areas of the wood that you’re planning to paint.
This is not mandatory, but if you sand the wood, the final result will look much neater and drawing itself will be a lot easier to do when the surface is smooth.
In order to paint with oil painting on the wood, you have to grind it with sandpaper a lot to have smooth surface otherwise brush doesn’t slide smoothly on the wood.
Step 3 – Putting Acrylic Primer.
After sanding, it is recommended to put two or three coats of special primer to the surface that you are planning to draw on. Choosing primer mainly depends on the type of paints with which you are planning to draw.
We would suggest using acrylic primer, which is often sold in art stores. It is perfect for coating of wood for acrylic, oil, gouache and tempera colors.
There is a video of preparing a sample work surface here.
Step 4 – Painting
With a prepared surface you can proceed to drawing!
Step 5- Varnishing
When you are done and happy with your result, you can either stop at this or you may consider varnishing your piece. Varnish should be chosen according to the type of paints that you used.
Apply one or more coats of it, let it dry thoroughly and you are finished!
Apply some varnish to make it last longer and have a shiny look. As it has its own texture and feeling it’s a lot enjoyable than painting on canvas.
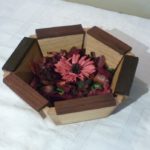
Multi-layer Wood Painting, An Interesting Method
Multilayer wood painting is an interesting style to create wall art.
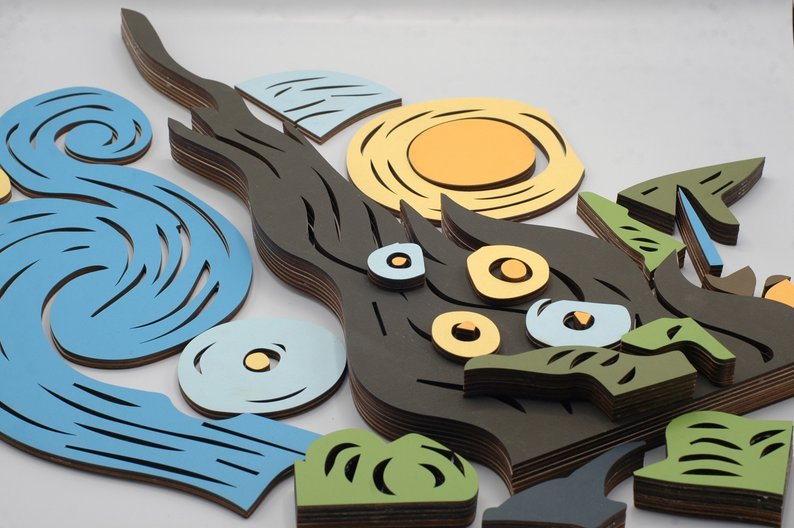
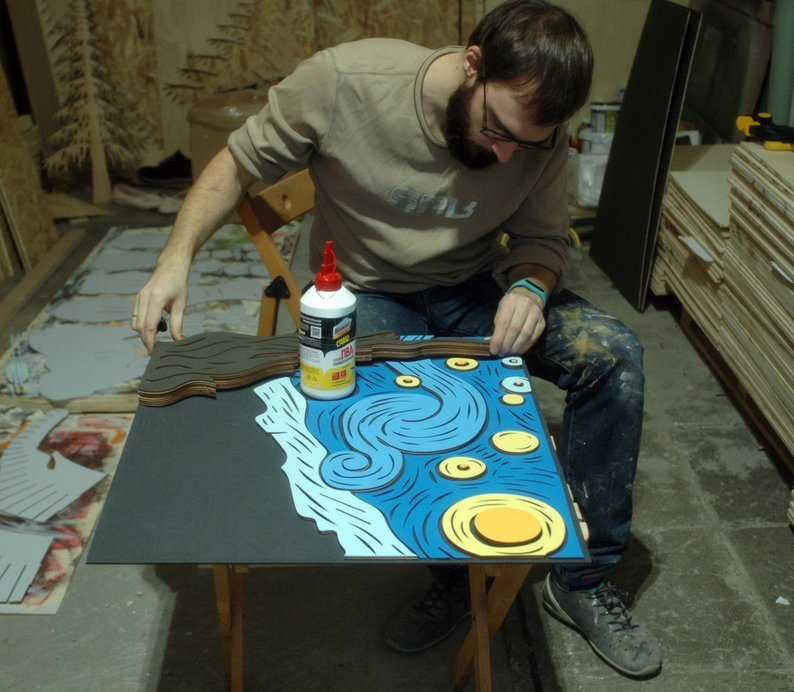
In this method, wood painting arts are made of a few layers of wood and acrylic paints. All layers of wood are cutting off with the help of CNC laser machine and then are glued together.
With this innovative method, you can turn a typical image into valuable artwork.
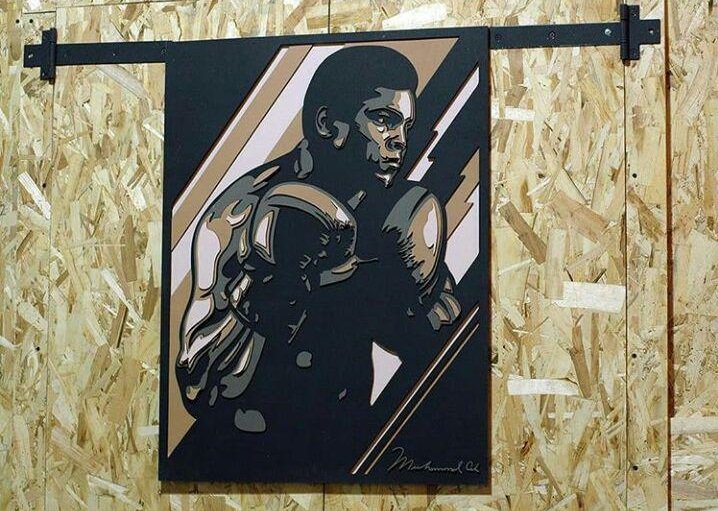

This wood painting is made of 6 layers of painted wood sections.
You can see different layers in the following image.
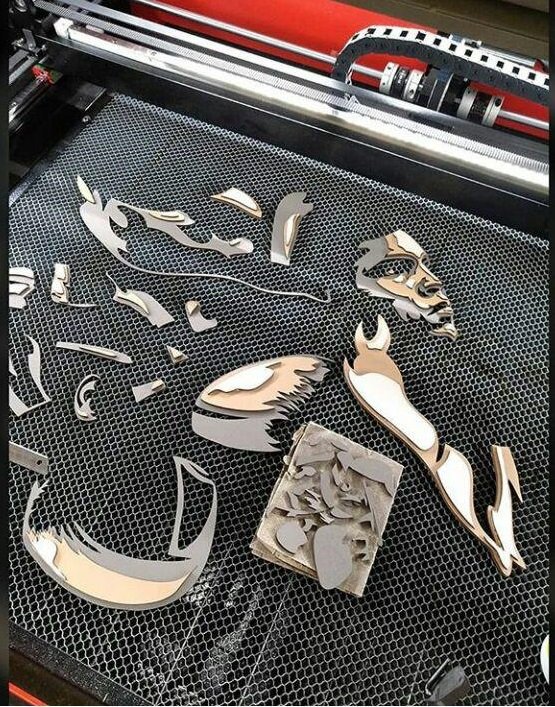
Instructions
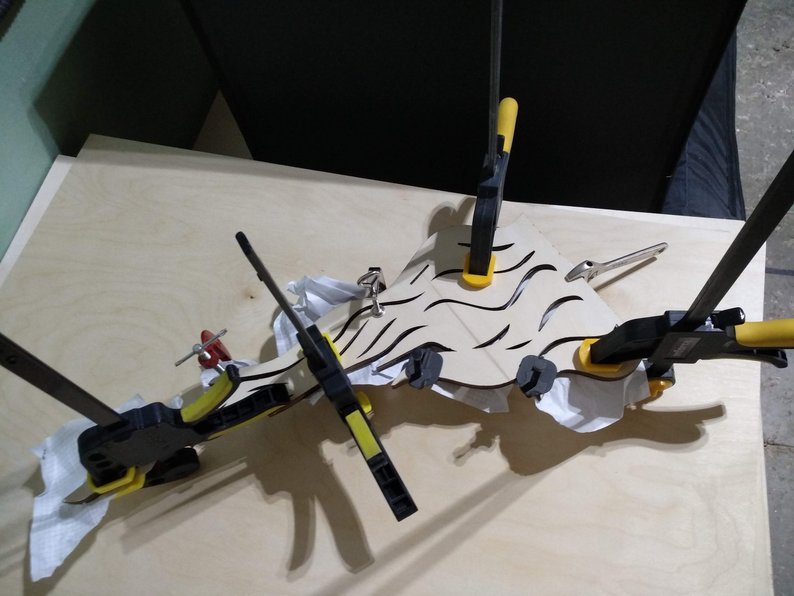
You can use a 1/8 plywood sheet for each layer. Each detail is cut off from this plywood sheet on the laser CNC machine. All details are colored with acrylic paint and glued together to make a whole composition.
If you are making several layers of painting, the very important thing is the correct placement of each layer on one that is below it. The etching can solve this problem!
You just need to etch an outline of the above layer and after that, you can easily find the correct detail and its correct placement!
The coloring all of the details may seem to be an easy task, but only if you are planning to do one single painting.
If you need to save time then you need to optimize this process.
That’s why you should first paint before cutting. Also, you can use a paint roller on a sheet and it all helps to get a plain color and a clear cut.
Also, the important part of each wood painting production is to save the layout of all its pieces.
It is more difficult to place these pieces on one sheet of plywood if you need to color them with different paints. So, etching is a solution again!
Place one color piece in different corners of the sheet and then draw the lines between these areas. After that you need to etch these lines, then paint different color areas which are divided by these lines and after that cut off all pieces!
Production of a multilayer wood painting can be presented as the next steps:
- Vector modeling
- Plywood sheet preparation (cut for the size of the CNC machine and sanding)
- Etching of different color zones and painting
- Laser cutting of all the details
- Gluing together all the details in correct order and place
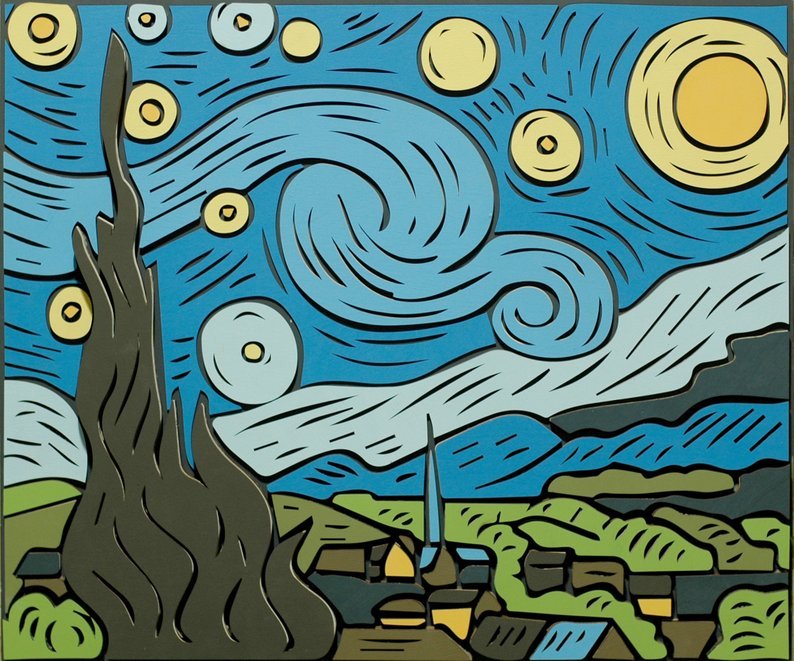
An interesting wall art, made of wood and acrylic paints. This wood painting is made of 9 colored wood layers in 9 different colors. All layers are cut off with the help of a CNC laser machine and then tied together.
This particular technique paints various three-dimensional layers.
Several layers make the painting to be three dimensional while photos cannot convey its beauty.
A summary of Steps of Painting on Different Wooden Objects
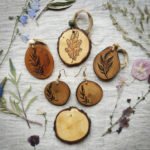
You can paint on any wooden object that you like.
By this art, you can donate life into wooden pieces again.
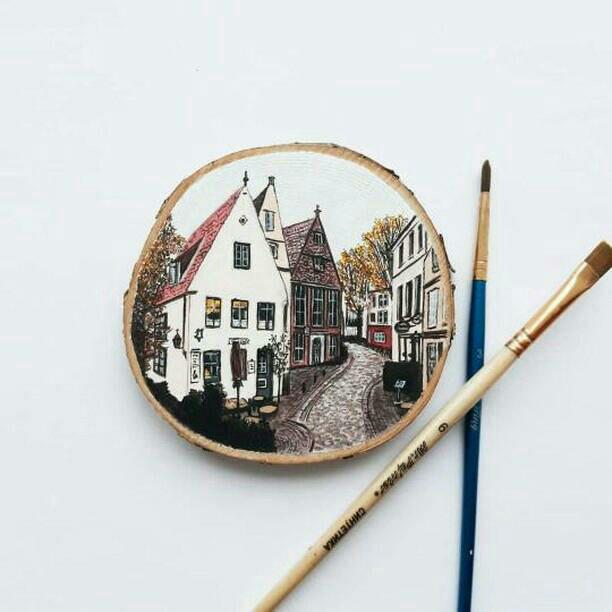
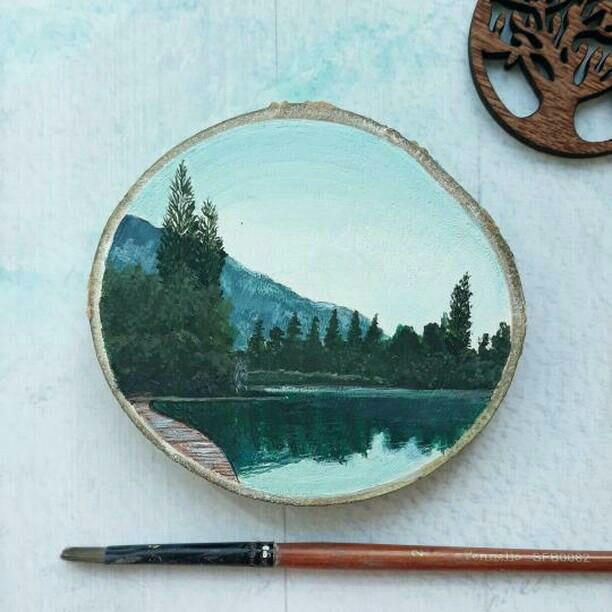
You can paint on old wood or wood sculptures or a slice of a wood log.
There are many craft stores that sell blank wooden pieces that you can paint on.
Experiencing all the steps of coloring the wood is very important.
So with a little patience and techniques to learn, you can paint on wood.
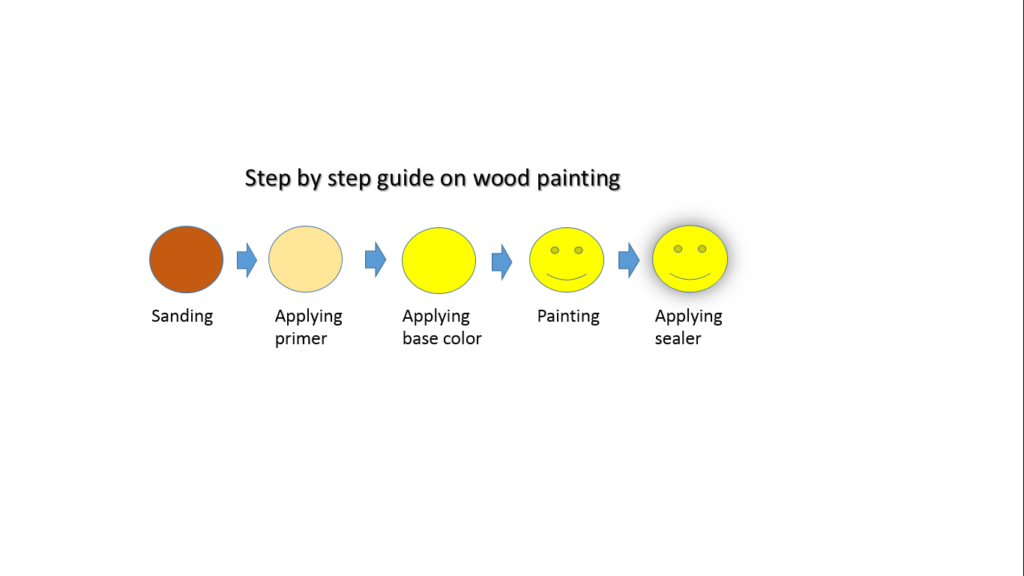
In this art, Regardless of which objects you work on, the preparation of wood is the first step you should do.
The preparation of wood has two parts:
Sanding
At this point, you have to smudge on the surface of the wood you want to paint.
You can use 140 to 180-grit sandpaper to sand the surface of the different objects.
If your object is old wood, before sanding you must remove any old paint from the surface of the wood as necessary.
Also, you must clean the surface of the wood with a dry cloth after the sanding.
Applying a Coat of Primer
In the next step, you can use the brush or the spray for applying a coat of primer.
This will seal the wood surface, and help it take the paint better.
This helps you make painting easier. Because it fills the imperfections and holes in the surface of the wood.
It will also help the paint to show up better, especially if you are using light colors in your painting.
Painting
After the primer is completely dry, the next step is Painting and Sealing the Wood.
If your image has a background color, you must first apply the base color.
Wait to dry and then paint the details.
If you do not wait for the background color to be completely dry, you can’t draw lines neatly.
Applying Sealer
After the paint has dried completely, you can Apply 1 to 2 coats of sealer.
There are many different sealers, including matte, glossy, and satin; Choose one that you like the best.
Apply a thin coat brush-on sealer, then let it dry and then apply a second coat. This will give your work a special look.
You can see step by step guide on wood painting in the info-graphic below:
This article proudly presented to you by Wood Dad blog team, with the help of our friends Anatoliy and Elena who have prepared some images of their work. They have an indescribable role in making this article as great as you see with their beautiful entries. Special thanks to them.
If you found this article helpful, Give thanks to Anatoliy & Elena by following them:


Comments
Pingback: Woodturning Art | Wood Dad
Pingback: All Types of Wood Arts In The World | Wood Dad
Pingback: DIY Wood Fashion Jewelry Ideas | Wood Dad
Pingback: 6 Ideas of Wood Crafts for Kids | Wood Dad