Are you looking for an awesome art piece to hang above your couch? A piece of geometric wood wall art can be the best idea. Traditionally, most people choose a painting for the space on the wall above the couch. But why don’t you try to be a little different and unique?
In this article, we have an interesting suggestion which is made of wood. Geometric wood art is one of the wood arts that creates a beautiful and geometric work of dry wood pieces.
In the following, while introducing this art, we will discuss the technical points of the process of making it.
You will be able to learn how to do this by reading this article. Make sure to watch the video at the end of the article.
What is Geometric Wood Art
We all know geometric shapes! At school, you’ve become familiar with shapes like squares, rectangles, triangles and so on. The art of geometric wood resembles a painting of geometric shapes made of pieces of wood. This art is also known as lath art.
In fact, the geometric wood art is a subset of the lath art.
In this art, the artist puts regular pieces of wood together to achieve a neat geometric shape.
Lichtenberg Wood Burning eBook

Download Lichtenberg Wood Burning eBook
One of the modern techniques for creating wooden artwork is called Lichtenberg wood Burning. In this eBook, we are going to introduce this newfound art to you.
This technique is known with some different names such as Lichtenberg wood burning, fractal wood burning, and electricity wood art.
This technique should not be confused with wood burning art or pyrography. The art of pyrography on wood is the art of creating motifs and designs by burning with hot metal tools on objects such as wooden surfaces.
Lichtenberg burning is a wood-burning technique for creating designs with electricity.
This eBook is a comprehensive guide on Lichtenberg Wood Burning. All you need to know for Lichtenberg Wood Burning is here.
This is a limited-time offer, order now to get access to the future eBook releases.
Nothing complicated, just look at the picture below! Everything is clear. But you will need different equipment to create a work of art like the one below.
We will deal with it in the next section.
How To Make Geometric Wood Art
Although it is easy to do, it is not very easy to prepare the right wood lath pieces. You will need many tools for cutting and painting.
Required Tools
- Miter Saw
- Circular Saw
- Nail Gun
- Tape Measure
- Paint Brushes
- Sander/Sandpaper
Materials
- Lath Pieces
- Half Sheet ½” Plywood
- Wood Glue
- Light Brown Stain
- Dark Brown Stain
- White Paint
Note that the colors you need will depend on your taste. So there are no restrictions and you can use different colors depending on your own style.
Step 1: Design on Plywood
Plywood is the base and backdrop of your project. You need to trace out your design on it. To do this, follow the procedure below.
- Divide your sheet of plywood into four sections. Of course, the divided one here belongs to this specific project and you can create different designs with your creativity.
- You will need a stencil to design on the plywood surface. Cut the end of one lath at 45 degrees. This will be used as your stencil.
- Use your stencil to begin tracing out your design.


Step 2: Cutting Pieces
When you draw your design on the plywood, you can begin cutting wood pieces for the design.
All cuts should be made at 45-degree angles. You can use Miter Saw for this purpose.
Use a pencil or ruler to mark an estimate for your overhangs. These don’t need to be perfect, as they will be trimmed down later.
Step 3: Painting Lath Pieces
Decide what colors you wish to use, but before that, if your lath pieces are rough, use a sander (or sandpaper) to sand away the imperfections. You can use any paint to stain wood.
See wood painting art.
You can also use a variety of hardwoods and softwoods to create a geometric wooden wall art piece. But it is better to use woods which are suitable for staining.
Step 4: Adding Lath Pieces to the Plywood
Allow your pieces to dry, and then begin adding them to your artwork with wood glue and brad nails!
Once your piece completed, use a circular saw and a track or straight edge to cut away the uneven ends. This will make the piece perfectly straight all the way around.
See the below video.
Next, cut and add your frame pieces with brad nails. Of course, you can use wood glue for this purpose.
It’s best to use dark colors for the frame to make your work looking better.
You’re almost at the end of the process of making a DIY geometric wood wall art.
Last, you must add your wall hangers and then hang that artwork.
In this short video, you will see how to paste those pieces on the plywood.
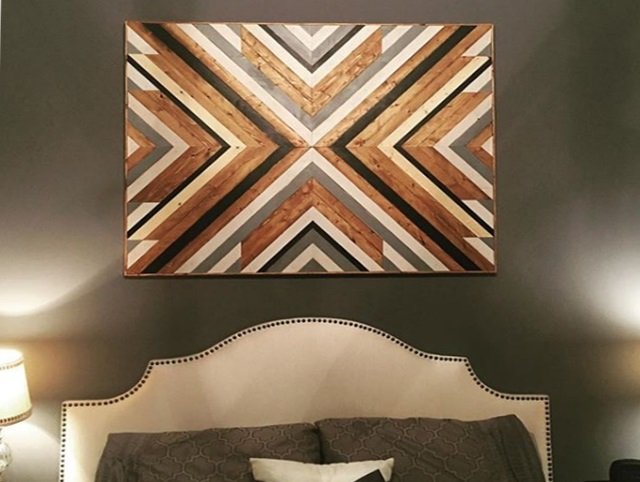
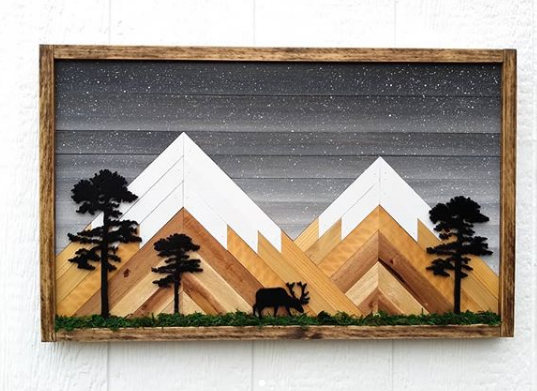
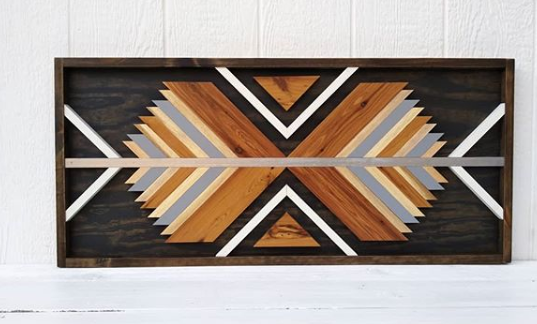
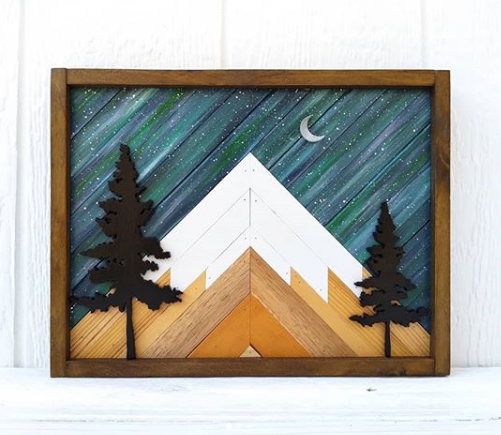
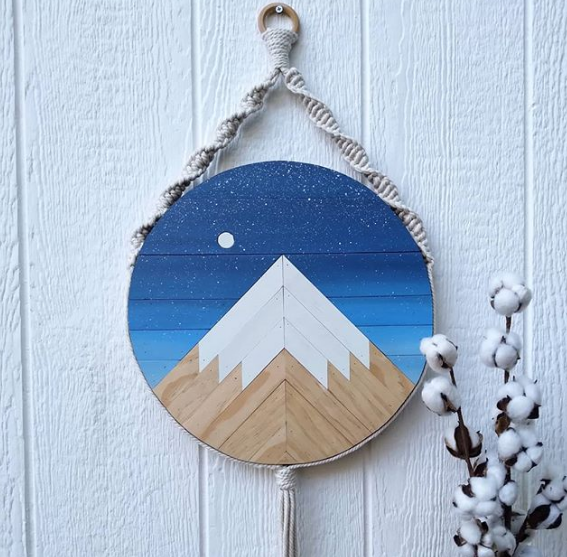
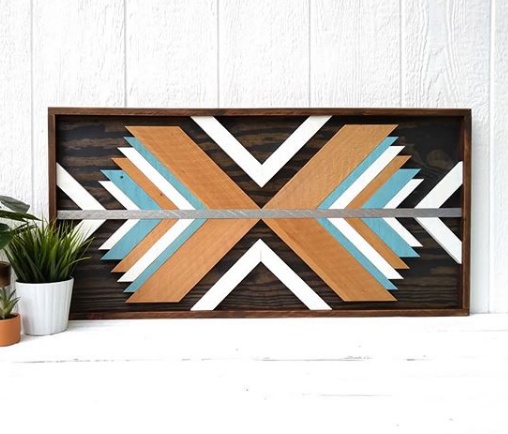
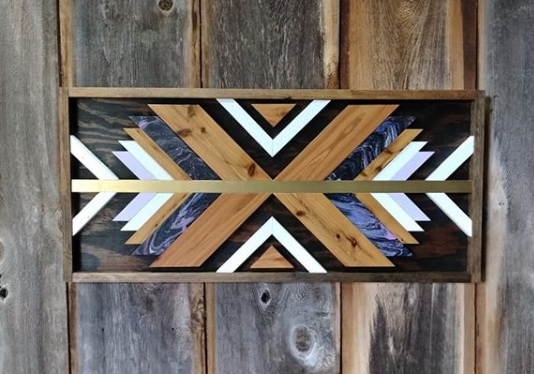
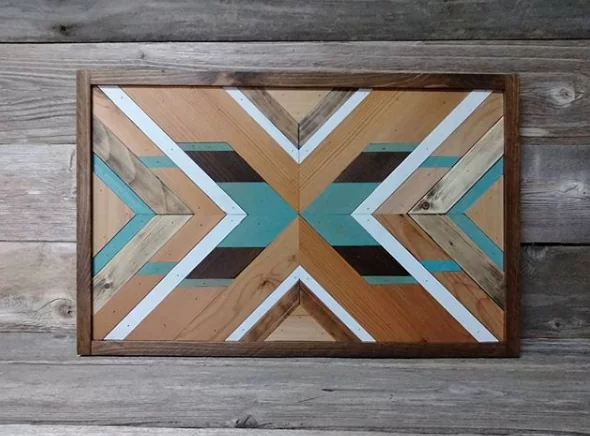
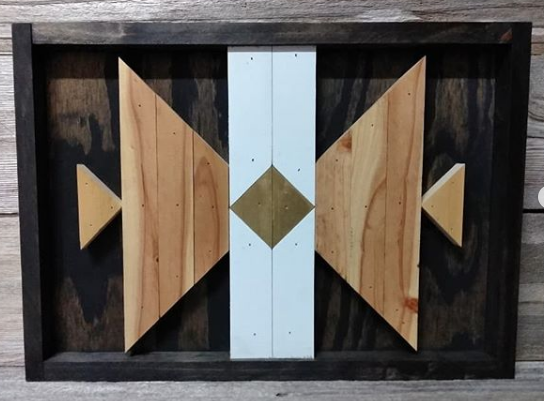
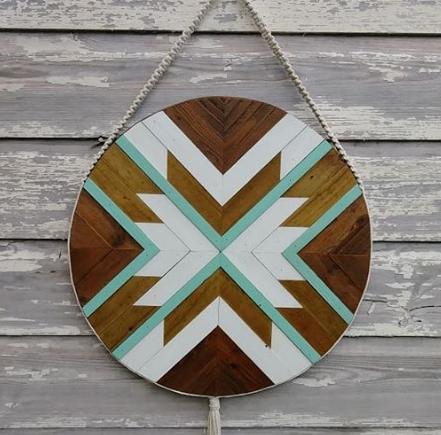
Cool Ideas of Geometric Wood Wall Art
Now that you’re familiar with the process of making a piece of geometric wood wall art, it’s not bad to take a look at some cool ideas.

Conclusion
Here we’ve tried to show you the process of making a piece of geometric wood wall art, which can be a great decorative art for your room.
Women are more interested in this art than men. So don’t forget, it can be a great idea to make and give to your wife or your girlfriend as a gift.
If you tried to make one, please don’t forget to share it with us so we can show it to the readers here.