
Making simple woodworking projects is one of the relaxing activities that many people do. You may think of desks, benches or shelves when you hear woodworking projects. Nowadays, DIY woodworking projects include a lot of fun as they have evolved to create wood projects that are not only functional but also enjoyable & cool.
Cool ideas of woodworking projects for high school students have always been a concern of students and beginners. In this article, we will show you three different DIY woodworking projects so you can find interesting woodworking projects ideas for high school students.
These projects are really simple and you can easily make them at home. If you enjoy DIY woodworking projects, making these projects will definitely help you spend a good time.
Required Tools for These Projects
The best part of these cool woodworking projects for high school is that these are really simple and you don’t need any special woodworking tool. This is a great advantage for high school students. The tools that you need are as follows:
- Wood: You can use natural wood such as walnut wood for these projects. You can also use plywood for some of them.
- Power drill: Power drills are one of the tools you need to make a hole in the wood. You also need Forstner bit and hole saw (hole cutter) for creating a hole in the workpiece. They are used in a drill.
- Wood joining tools (glue, nail or screw)
- Measuring tape
- saw (hand saw or table saw)
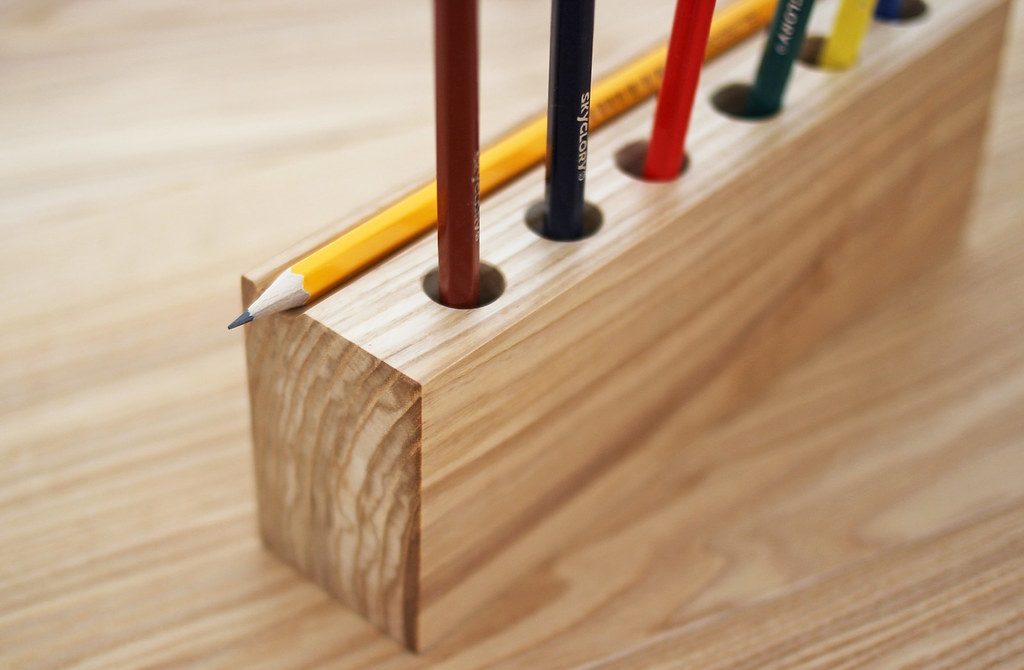
Wooden Pencil Holder
Materials and Tools:
- A piece of timber (Cubic or cylindrical )
- Power drill
- Hole saw drill bit (different sizes)
Method:
- Draw a grid on the top surface to find places for the holes that will hold the pencils.
- Create holes in specified places. Make sure the saw bit which you choose is big enough for a pencil or pen to be inserted into its hole. You’ll also have to make sure you are drilling at as much of a 90-degree angle as possible.
- Once the holes have been drilled, sand the top surface to remove any splintering caused by the saw bit.
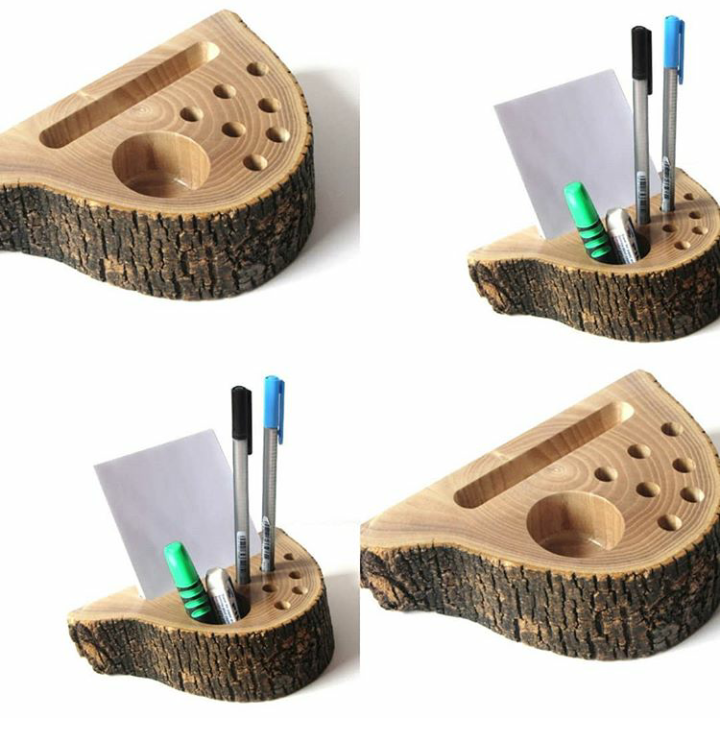
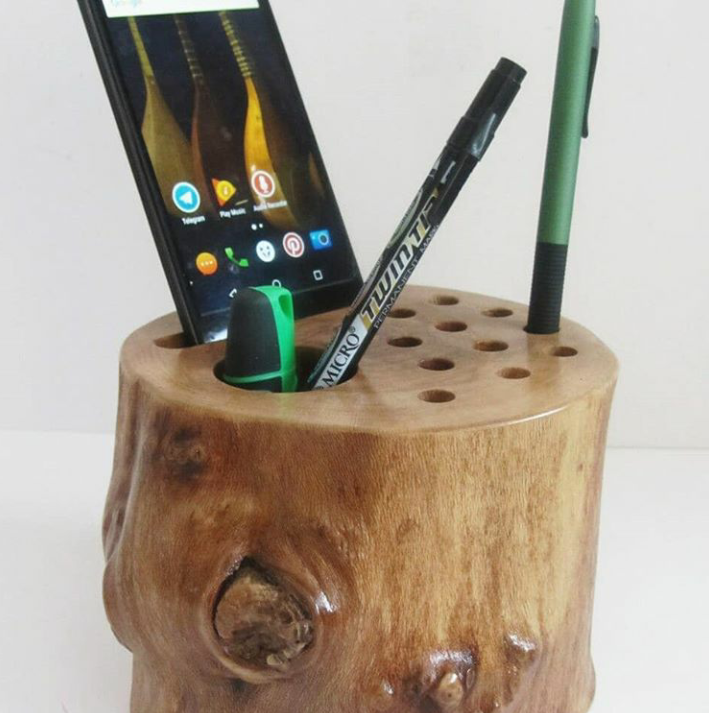
Other Ideas For Wooden Pencil Holder
Wooden Tablet Holders
Materials and Tools:
- Pieces of timber (you can use wooden frame)
- Wood glue: you can use any wood glue even waterproof wood glue to protect it from water.
- Two screws or nails.
- Table saw or hand saw.
- Glue wood clamps.
Method
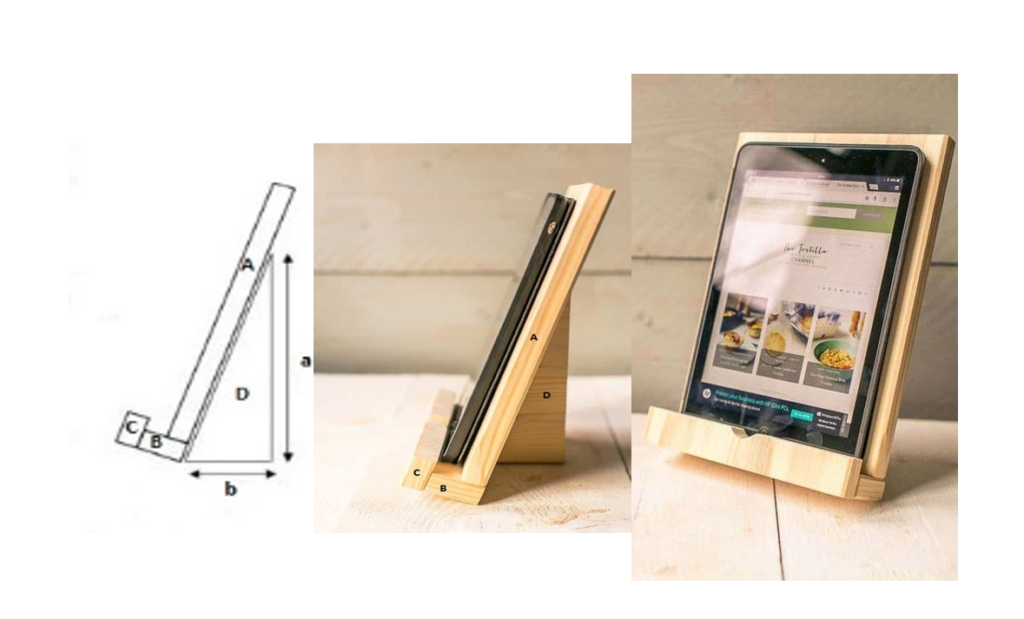
This is a more difficult woodworking project for high school students than the previous one. You can see the plan in the image below.
We’ve prepared a clear image of what you should build at the end. As you can see, it may be more difficult than a wooden pencil holder, but not as much as you can’t build one!
The Wooden Tablet Holder has 4 part (A, B, C, and D) that you can cut to fit it with your tablet size.
Lichtenberg Wood Burning eBook

Download Lichtenberg Wood Burning eBook
One of the modern techniques for creating wooden artwork is called Lichtenberg wood Burning. In this eBook, we are going to introduce this newfound art to you.
This technique is known with some different names such as Lichtenberg wood burning, fractal wood burning, and electricity wood art.
This technique should not be confused with wood burning art or pyrography. The art of pyrography on wood is the art of creating motifs and designs by burning with hot metal tools on objects such as wooden surfaces.
Lichtenberg burning is a wood-burning technique for creating designs with electricity.
This eBook is a comprehensive guide on Lichtenberg Wood Burning. All you need to know for Lichtenberg Wood Burning is here.
This is a limited-time offer, order now to get access to the future eBook releases.
The important thing here is that the size of “a” is triple of “b”. This ratio is essential for tablet holder balance.
You can use glue or metal screws for joining different parts. See 8 Simple wood joints for beginners and wood joints without nails. It can be useful for you.
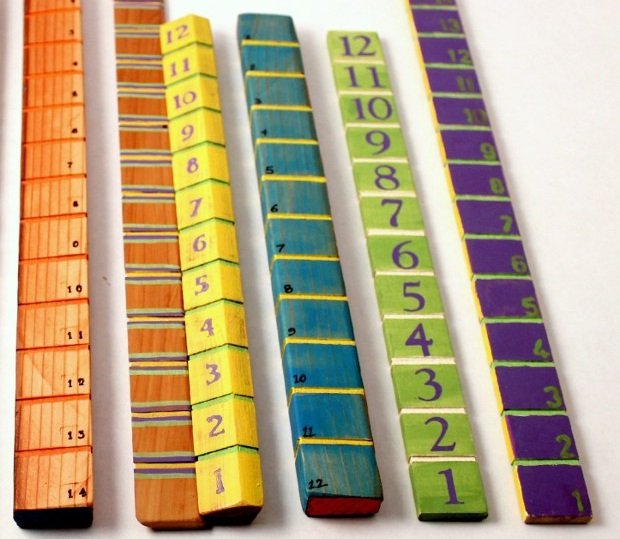
Handmade Wooden Ruler
Materials and Tools:
- A timber with desired length (12 to 14 inch in length is well)
- Hand saw
- Measuring tape
- Sealer
Method:
- Find a timber and cut it to your desired length by a hand saw. You can also cut it on the table saw to the desired width.
- In the next step, you should cut shallow grooves (about %6 inches deep) on the ruler surface with a 1-inch distance between each one to create a measuring line, by using the hand saw.
- Next step is to carve the numbers. You can use stamps and stencils, and even leather stamps to engrave the numbers into your ruler.
- When the numbers are dried, apply a sealer and stain to the rulers.
The Advantage of Making Woodworking Projects for High School Students
A woodworking project makes an excellent sense for any student with an appreciation for nature. Building these projects can increase the confidence of high school students and encourage them to do some technical work.
There are 3 Cool woodworking projects for high school in here.
These are beautiful and tactile objects that are fun to use, and nobody will never guess how fast, easy, and cheap they have been made. In addition, they are a great way to use small wood scrap and save money for the students.


1 Comment
These projects are fantastic for high school students! I love how they balance creativity and skill-building. Can’t wait to try the bookshelf project with my son!