
Wood joints are one of the most important parts of the woodworking profession. In most woodworking projects, you need to put the woods alongside & fit them in the right way.
If you are a beginner, you may not be aware of the best woodworking joints. Some wood joints are made with nails and screws, and some are glued. There are even different wood joints that connect without nails.
Each of these connections has its advantages and disadvantages. You can choose the best type of wood joists according to your project.
Perhaps you do not know which joint is suitable for which project, but there are a number of simple wood joints that have a lot of use.
Here are 8 simple wood joints for beginners.
1- Butt Joints
Butt joints are an edge-to-edge connection (see above figure). This joint is the simplest and most basic kind of wood joints. Usually used in projects that:
- If there is a seam between the timbers, there is no problem in the work and you are not worried about this.
- You do not have the necessary equipment to make other joints.
- Depending on the project, you have to use butt joints.
For connect two or more boards together, you should apply the edges of the board to wood glue and carefully put it together. Depending on the type of your work, you can use a clamp, a screw or a punch.
Lichtenberg Wood Burning eBook

Download Lichtenberg Wood Burning eBook
One of the modern techniques for creating wooden artwork is called Lichtenberg wood Burning. In this eBook, we are going to introduce this newfound art to you.
This technique is known with some different names such as Lichtenberg wood burning, fractal wood burning, and electricity wood art.
This technique should not be confused with wood burning art or pyrography. The art of pyrography on wood is the art of creating motifs and designs by burning with hot metal tools on objects such as wooden surfaces.
Lichtenberg burning is a wood-burning technique for creating designs with electricity.
This eBook is a comprehensive guide on Lichtenberg Wood Burning. All you need to know for Lichtenberg Wood Burning is here.
This is a limited-time offer, order now to get access to the future eBook releases.
2- Mitre Joint

Mitre joints are better than butt joints for corners of projects.
You need to cut the wood at 45 degrees to run and put them together that creates a 90-degree angle.
These joints can be seen in the kitchen cabinets, picture frames, windows and almost all wooden and MDF structures.
You can use the miter saw to run this connection. In this joining, you can use glue or screw and other methods for keeping it fixed.
3- Mortise and Tenon Joint
Mortise and Tenon Joint is an old connection that all carpenters are familiar with.
It is very sturdy and can be used with glue for more strength. This joint is a great way to connect two blocks of wood, which is used to build doors and windows, ladders, tables, chairs, and so on.
Sometimes beginner woodworkers apply a lot of glue to the place of the joints, and when bonding, the glue is poured out and this makes it difficult to paint.
The point to consider is to use very low glue for this joint and try to fasten it without glue, and this depends on your skill.
4- Dowel Joints
Dowel Joints can be used for joining two pieces of wood in Butt Joints in any jointing configuration. In this joint, two holes will be created in the woods and by dowels, they connect to each other. See figure below:
You can use pegs or metal screws instead of dowels. However, the metal screws are stronger and the pegs are more beautiful. You can choose them depending on the type of project.
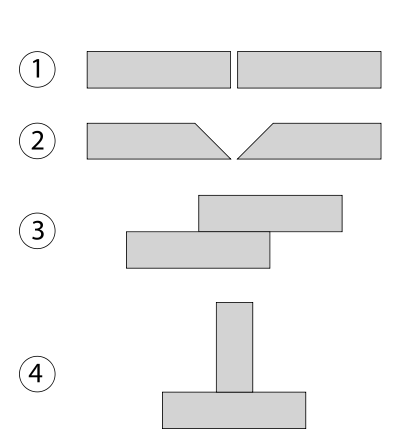
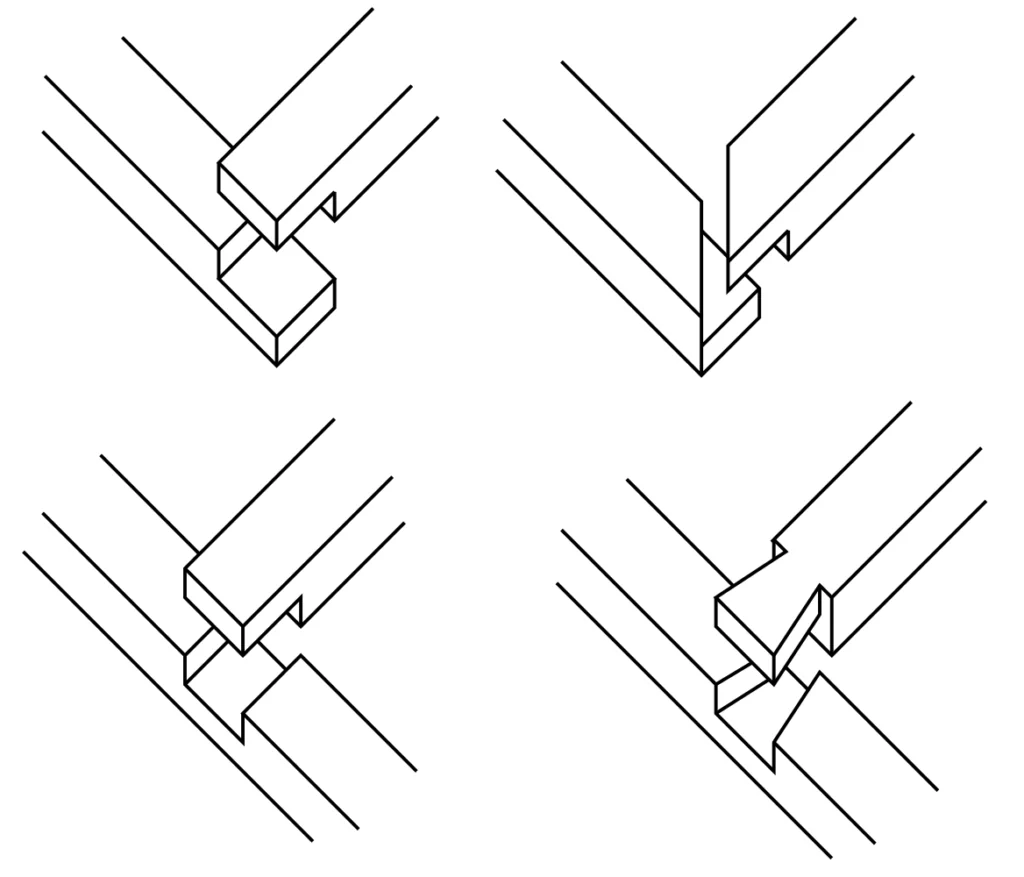
5- Rabbet joint
One of the easiest and most interesting joints that have different types. No explanation is better than seeing the following screenshots. You can see different types of rabbit joints below.
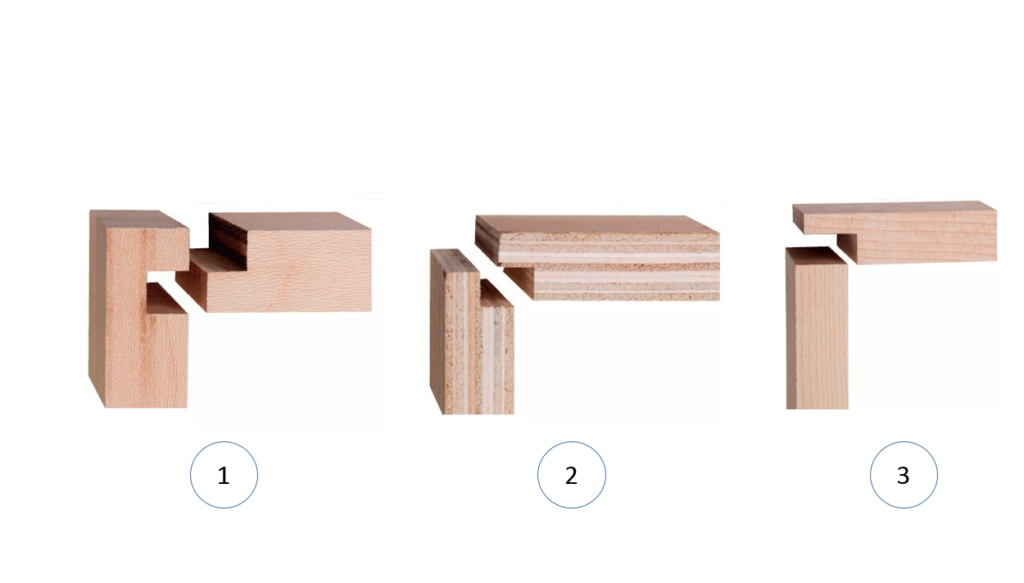
Figure 2: Double Rabbet Joint
Figure 3: Overlap Rabbet Joint
This joint is comfortable for cutting and should be glued together with wood glue. The key to this connection is to increase the contact surface of the connector, which makes it stronger than the Butt joints.
6- Lap Joint
Lap joints are a strong joint because the connection surface is wide. This joint requires wood glue and you need to make sure that the long edges are perfectly flat.
You can also use the screw and nail. Lap joints can be created at the ends of timber or can be created in the middle.
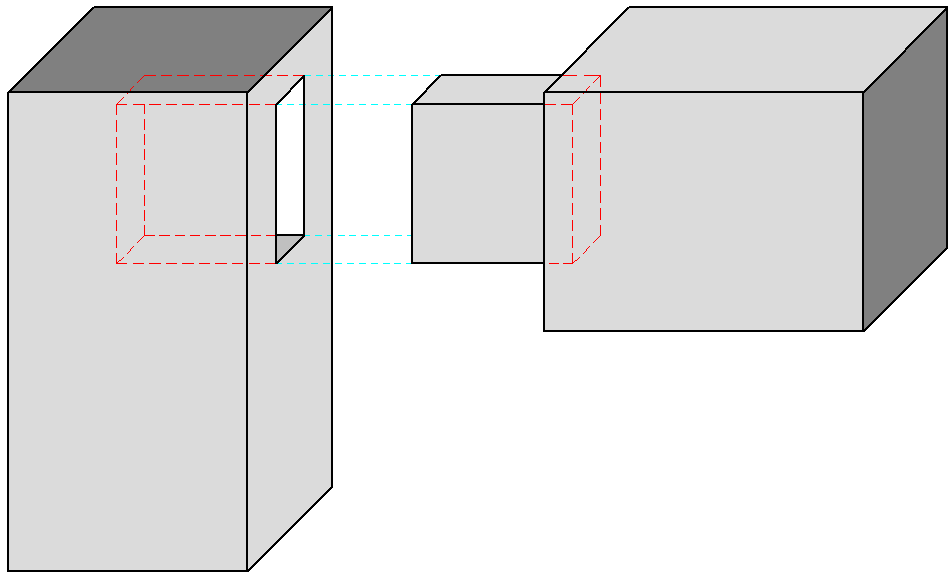
7- Dado joint
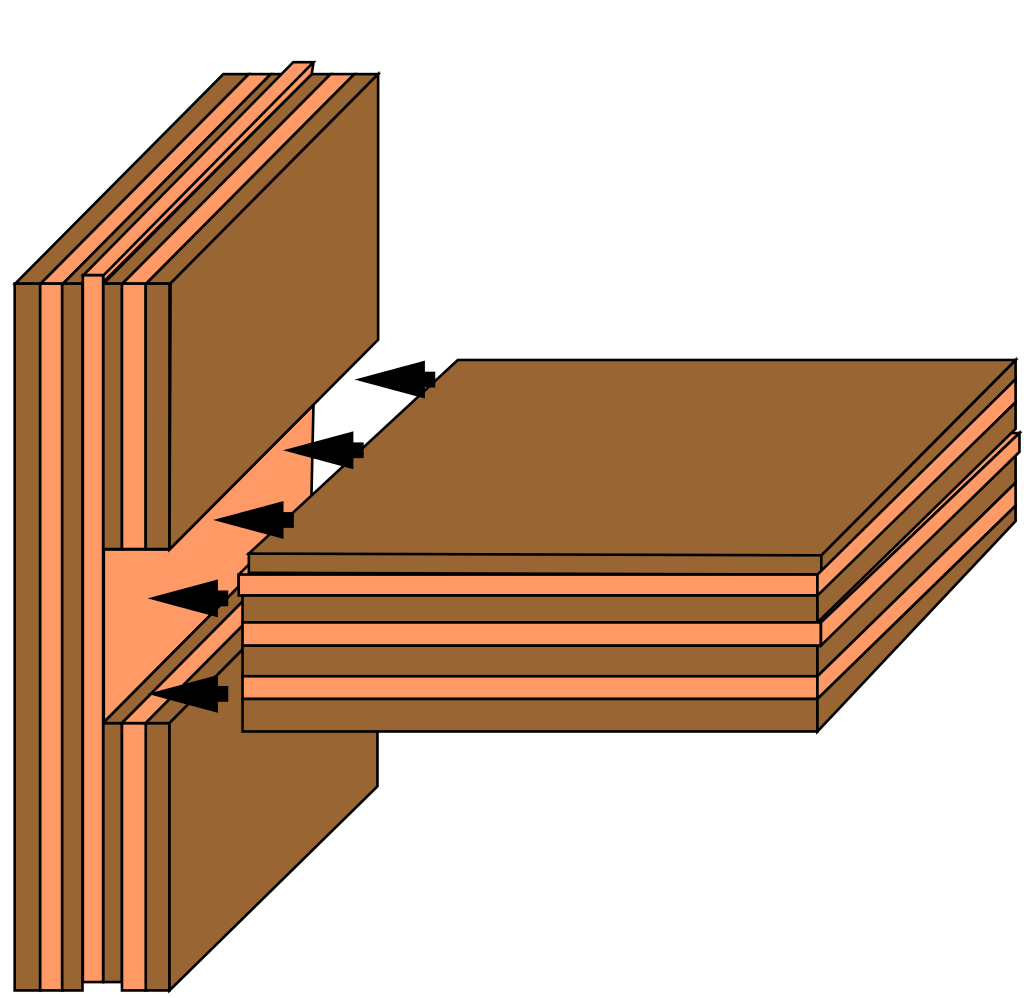
Dado joint (housing joints in the UK) is one of the most widely used carpentry joints.
This simple woodworking joint is being used in many carpentry projects such as kitchen cabinets. Dado is a slot or trench cut into the surface of a piece of wood that the other wood will be placed inside.
Any woodworker, for sure, will run into a situation where they’ll need to use this joint, so getting the mastery over it for beginners is a good idea.
8- Stopped dado joint

The stopped dado joint is used for woodworking projects where you don’t want the edges to be seen, so the edge & cut lines wouldn’t be seen in front of the finished project.
Making stopped dado joint isn’t so hard, but as like as any other wood joints, it needs to be cut accurately for a perfect fit.


2 Comments
Pingback: Wood Joining Tools | Wood Dad
How to connect wooden pegs
You can use wood glue for extra strength.
Pingback: how to make lap joints with skill saw - Saw Tool