The problem of wood warping in woodturning projects is one of the issues that has been neglected, but it is, in fact, an important issue, which neglecting will result in lower product quality.
Have you ever bought a wooden container and then realize that the container won’t be opened & closed well? If you’re a woodturner, It may have happened to you that build a beautiful dish, but later, you will notice that the container door does not close well.
This is due to the problem of wood warping. We show you in this article a solution to this problem.
What is the wood warping?
Let’s see at first, what is the cause of the wood warping.
Phenomena of wood warping are well seen on a timber. Any curvature and the deviation from the flatness, which is gradually being created in timber, is called wood warping.
Wood warping occurs in all types of wood in any shape. One of the reasons for wood warping is internal stresses of wood and uneven shrinkage. The cause of wood shrinkage is the gradual drying of wood.
A seemingly dry wood still has some moisture that disappears over time. Wrapping wood can create cracks in the wood or make the surface cracks deeper.
Lichtenberg Wood Burning eBook

Download Lichtenberg Wood Burning eBook
One of the modern techniques for creating wooden artwork is called Lichtenberg wood Burning. In this eBook, we are going to introduce this newfound art to you.
This technique is known with some different names such as Lichtenberg wood burning, fractal wood burning, and electricity wood art.
This technique should not be confused with wood burning art or pyrography. The art of pyrography on wood is the art of creating motifs and designs by burning with hot metal tools on objects such as wooden surfaces.
Lichtenberg burning is a wood-burning technique for creating designs with electricity.
This eBook is a comprehensive guide on Lichtenberg Wood Burning. All you need to know for Lichtenberg Wood Burning is here.
This is a limited-time offer, order now to get access to the future eBook releases.
Many factors can contribute to wood warp; wood species, grain direction, air flow, sunlight, the temperature and even cutting season.
Wood Warping in Woodturning Projects
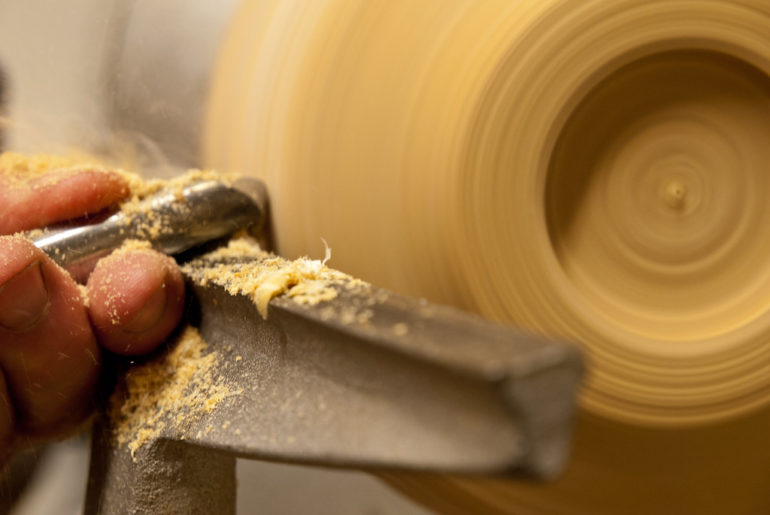
The nature of the woodturning projects is to have symmetry and balance. Consider a turned bowl. Definitely, a bowl should be a perfect circle.
The problem of the wood warping can eliminate the balance of your project. The problem with the wooden container with a door is that it may not be closed properly.
Perhaps the curvature of the container is not visible to the eye, but if you connect the container to a lathe, you will notice an imbalance.
This problem can lose the value of a turned wood artwork.
The solution of the Wood Warping Problem
First of all, you should always try to use wood that is completely dry (seasoned wood) for the woodturning.
But this is not enough to prevent the warping of the wood. So what is the solution? Here’s a trick to solve this problem in the woodturning projects. You have to shave the wood in two steps.
In the first step, the project body should be turned thicker and placed in the workshop for 6 weeks. Of course, the length of this period depends heavily on the humidity and temperature of the workshop, the season and the climate of your place of residence, as well as the type of wood you use.
You must experimentally find the approximate time. After this period, the project will shave again and corrected to be fully balanced.
If you have a door for your project, then you start building it. The container’s door won’t be curved because of its small size and it is not necessary to wait 6 weeks.
There is another trick if you want to make a container with a door. You can make the front section of the container a few millimeters larger than the diameter of the door so that after the container is shrunk, it will fill the container door.
Greenwood for Woodturning
You can use this method for Greenwood. But notice that in the first step it should be thicker because it is likely to crack it.
Also, in the second stage, there is a need for a lot more to balance. Note that there should be more time between the two steps.
This time again depends on the type of wood and environmental conditions. Note the probability of the warp of the Greenwood after these two stages also exist.
So you can divide this method into three steps. We recommend that you use completely dry wood for this purpose so that your work does not go away.
Below is a helpful guide to drying the wood for woodworking.
How To Dry Wood
Outdoor wood drying is one of the old ways to eliminate moisture inside the wood. The outdoor wood drying method is the simplest and cheapest method of drying wood, but achieving the result in this way is very time-consuming.
The time required to dry the boards depends on the species of wood, the initial moisture content, the thickness of the boards, the density, the environmental conditions and the techniques of wood processing.
The traditional rule for wood drying is that you should consider one year to wait per 1 cm of the thickness of the board. Obviously, this claim considers only a few of the variables listed above. Drying in the oven has advantages like high-speed drying, removing mushrooms and bacteria.
It is said, there are also some disadvantages. The first one is the cost of making a furnace and the second one is the cost of energy to heat it.
Here are some important points to keep in mind when drying wood:
- If a tree is newly cut, it is advisable to quickly turn the tree into the timber. This will help the wood to open and dry.
- Take the woods a bit bigger than the final size. Remember that the wood is smaller when it dries.
- Covering the sealing end of the wood; Remember that moisture is removed from the bottom of the wood 10 to 12 times faster than its surface
- Choose an indoor area that is open around it, with low humidity and easy air flow, the sun does not have to go straight to the wood, also protect it from the rain and snow.
- A number of bases at a height of 25 to 40 centimeters, preferably placed on the floor of a cementitious block, to prevent the moisture from reaching the floor, and the air flow to be good enough, the distance between the bases can be 50 centimeters.
- When you put the wood properly, it’s very useful to put loads or heavy weights on it; it does greatly prevent the woods from warping.


Comments
Pingback: Some Woodturning Tips & Tricks You Should Know | Wood Dad
Pingback: Seasoned Wood, Everything You Need to Know - Wood Dad