Woodturning is one of the most known woodworking arts. As you may know Woodturning art is the technique of turning and shaping the wood due to the rotational movement of the lathe machine.
After attaching the wood to the lathe and starting to rotate it, the operator gives the desired shape to the wood with a sharp tool like a chisel. With this simple definition, it also has a lot of tips and tricks that you need to know.
If you want to make high-quality and trending products, this article will be useful for you.
In this article, we will teach you some tips on carpentry that come from years of experience of different carpenters.
You surely won’t find some of the tricks of this article anywhere. If you are a beginner or a professional, it’s makes no difference, don’t miss this article. Stay with us.
Woodturning Equipment List
You are probably familiar with the equipment and tools for woodturning. However, we have a list of equipment which are needed for this profession here:
- Lath machine and supplies (chuck)
- Woodturning tools (gouge, chisels, scrapers, and parting tool)
- Some common woodworking tools (band saw, hand drill, knife, sandpaper)
These are the three general categories of equipment you’ll need for woodturning art.
Lichtenberg Wood Burning eBook

Download Lichtenberg Wood Burning eBook
One of the modern techniques for creating wooden artwork is called Lichtenberg wood Burning. In this eBook, we are going to introduce this newfound art to you.
This technique is known with some different names such as Lichtenberg wood burning, fractal wood burning, and electricity wood art.
This technique should not be confused with wood burning art or pyrography. The art of pyrography on wood is the art of creating motifs and designs by burning with hot metal tools on objects such as wooden surfaces.
Lichtenberg burning is a wood-burning technique for creating designs with electricity.
This eBook is a comprehensive guide on Lichtenberg Wood Burning. All you need to know for Lichtenberg Wood Burning is here.
This is a limited-time offer, order now to get access to the future eBook releases.
Of course, woodturning is a wood art and you also need the creativity and artistic sense to create valuable works.
Woodturning Methods
A) Spindle Turning (Also known as turning between centers):
In this type of woodturning, the workpiece is placed between the headstock and tailstock (it’s center axis). The rotational force will be passed through the headstock to the workpiece, and the tailstock will put a pressure to prevent the workpiece from being separated.
B) Bowl Turning:
This method is mostly used for making hollow pieces such as bowls, pots, etc. For making these kind of products, one side of the workpiece must be free for hollowing.
In this way, a chuck is installed on the lathe machines instead of a headstock. One side of the workpiece is screwed to the chuck and the other side remains free.
With this arrangement, the piece can be rotated and hollowed easily without the need for a tailstock.
5 Cool Woodturning Tips & Tricks
1- Wood Warping
In woodturning projects, workpiece balance is very important and usually, the quality of a turned project depends on it. But sometimes after completion of the work, the wood warping problem will usually cause the product to become unbalanced.
See wood warping in woodturning projects.
We have a solution to this problem in the mentioned article.
2- Listen to the Sound of Wood
The wood tells you everything. It says itself to you that what you can make from it.
It’s great to get started with a plan, but at the end, it’s the wood itself which guides us to the final shape.
Listen to the sound of the wood screaming when it gets too thin. If you don’t have a sound level meter, tap on the surface of the container and listen to the sound.
It’ll tell you which part is thinner and which part is thicker.
When a piece of wood is cracked, it sounds like a squeak. It even warns when it’s going to get out of the machine. You just have to listen to the sound.
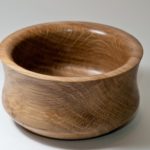
NOTE: Of course this form of containers does not require a sound level meter. With a quick look, we can examine whether the wall is flat or not. We chose this kind of containers for this video because we can easily reflect inside the container.
3- Wood Texturing Techniques in Turned Projects
Using wood texturing techniques in turned projects is a great idea. See below image.
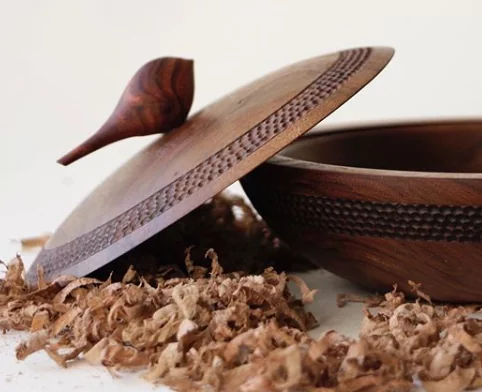
When the work is still on the machine, cut through a corner of a sharp chisel or pencil with two very fine lines and specify the area you want to have texture.
Use the top of the machine to make it easier to control.
4- Cutting Direction
You can take a cross-section of a log and make a bowl from it by the lathe machine. It’s relatively easy. Its cross-section is roughly circular and just shave enough to make it smooth. Most of the time we have to do the same thing. But there are 3 problems:
- The texture of the project will not be very good.
- Shaving the inside of the projects can become very hard.
- Polishing of work at the wood fiber direction can become harder and the roughness will not disappear.
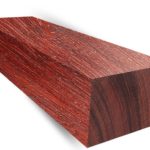
The color of the wood is also brighter on the outside (under the skin). Of course, this is a taste that many people might like it.
So, we should try to use timber to cut the wood longitudinally and consider the thickness needed.
5- Finishing: Applying a Food-Safe Oil
Woodturning projects are commonly used as containers for foods and drinks. So you have to use a natural oil for finnishing the work. Apply oil while you’re still working on the machine.
Food safe oil formula: Olive Oil + Sesame Oil + Honey Wax 🙂
This article proudly made by the help of our friend, Azadeh Masoomi (Credits back to her for great images and videos of the work). Her Instagram Profile: @azadeh_msm