Woodworking hand saws are one of the basic woodworking tools. They have different types and each one is suitable for a particular work. In this article, we are going to explore all types of woodworking hand saws.
What is Hand Saw?
Sure you know what a saw is, but there are some tips in defining that can be helpful.
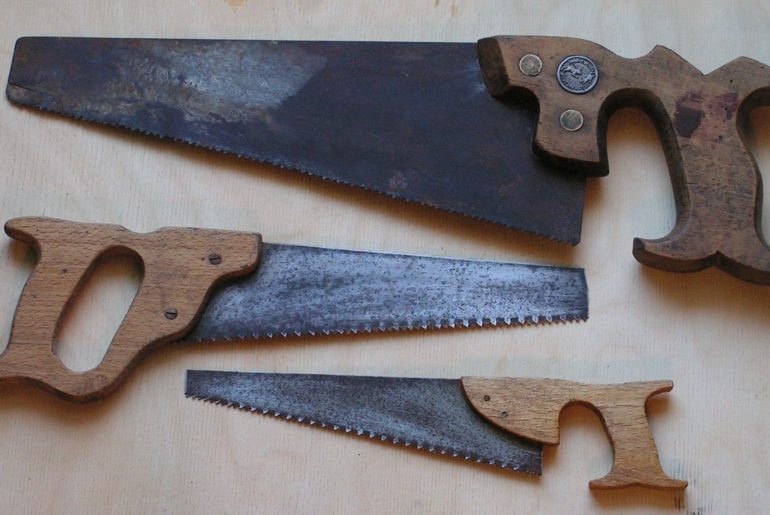
The familiar woodworkings hand saw consists of a steel blade with a handle, most commonly woody, at one end.
The blade is narrower at the end opposite the handle. This end is called the toe; the end of the blade at the handle is called the butt or heel.
The lower edge of the blade has cutting teeth, which are set (bend alternately side to side) to make the kerf (the groove cut by the teeth) wider than the thickness of the blade.
This is necessary so that the blade does not rub against the sides of the kerf and bind.
In addition, good-quality saws are taper-ground, with the top edge thinner than the toothed edge; this further reduces friction inside the kerf.
Lichtenberg Wood Burning eBook

Download Lichtenberg Wood Burning eBook
One of the modern techniques for creating wooden artwork is called Lichtenberg wood Burning. In this eBook, we are going to introduce this newfound art to you.
This technique is known with some different names such as Lichtenberg wood burning, fractal wood burning, and electricity wood art.
This technique should not be confused with wood burning art or pyrography. The art of pyrography on wood is the art of creating motifs and designs by burning with hot metal tools on objects such as wooden surfaces.
Lichtenberg burning is a wood-burning technique for creating designs with electricity.
This eBook is a comprehensive guide on Lichtenberg Wood Burning. All you need to know for Lichtenberg Wood Burning is here.
This is a limited-time offer, order now to get access to the future eBook releases.
Types of Woodworking Hand Saw
The woodworking hand saws are described by the number of teeth per inch.
Actually, since the measurement is made from point to point on the teeth, there is always one more point in the designation than there are teeth per inch.
A number stamped on the blade near the handle gives the point size of the saw.
Usually, the lower the point size, the easier and faster the saw will cut; the higher the point size, the finer and smoother the cut.
There are two broad classifications of woodworking hand saw:
- Ripsaws
- Crosscut Saws
Ripsaws are designed to cut with the grain of the wood; crosscut saws cut across the grain.
The latter should probably be your first purchase.
The major difference between a crosscut saw and a ripsaw is the shape of the teeth.
On a crosscut saw, the teeth have beveled, knifelike cutting edges that sever the wood fibers running with the grain of a piece of wood.
For general use, an 8-point crosscut saw is recommended.
If the saw will be used primarily for fine work-cutting tri or hand woods a 10 – or 12 points may be preferable.
Ripsaw have teeth with square-faced, chisel-like cutting-edged that do a good job of cutting with the wood grain, but a poor job of cutting across it.
Most ripsaws have 5 or 6 points per inch.
Sawing Tips
When using a woodworker’s hand saw to cut a piece of wood, place the board on a sawhorse or similar sturdy object, or in a vise.
For longboards, use two sawhorses so that the board rests solidly. Use a square and a pencil or an awl to mark a cutting guideline on the wood.
Hold the saw in your right hand (unless you are a southpaw) and grasp the board with your free hand.
For crosscutting, hold the saw at an angle of approximately 45 degrees to the wood surface; for ripping, hold it more nearly vertical, about 60 degrees.
Be sure that the side of the saw blade is plumb (at right angles) with the face of the board.
Although these saws are designed to cut on the push stroke, it is usually easier to start the cut by placing the heel of the blade on the cutting line and polling to toward you to begin the kerf.
Then take short, light strokes (applying pressure on the push stroke only) and gradually increase the strokes to the full length of the saw.
Keep the action smooth; do not force or jerk the saw.
Your sawing arm should swing clear of your body so that the saw handle is at your side rather than in front of you.
Keep your eye on the guideline, not on the saw, while cutting; this will enable you to see any tendency of the saw to wander.
If it does, take shorter strokes and twist the handle slightly to bring the saw back to the straight and narrow.
Blow away sawdust frequently so that the guideline is not obscured.
Slow down to make the final strokes of the cut.
Hold the waste piece in your free hand so that the board will not split as the last few strokes are made.
If a saw sticks or binds during a cut, it may indicate a dull or poorly set blade. Other causes are too much moisture in the wood or forcing the saw.
You can use a wedge in the kerf behind the blade to prevent binding; this will probably be necessary when ripping longboards.
Backsaw
A backsaw is a crosscut saw designed for cutting a perfectly straight line across a piece of wood.
A heavy steel backing, or “spine” along the top of the blade keeps it perfectly aligned.
Back saws usually have 12 or 13 points per inch. The saw may be used freehand; but for more precise cuts, use it in conjunction with a miter box.
The miter box ensures exact 90 degree or 45-degree cuts. Many commercial miter boxes can be adjusted for other angles, or you can make your own miter box out of wood, slotted for whatever angle cuts a project requires.
Dovetail Saw
For very fine cutting, a dovetail saw is a choice.
This is something like a backsaw, except that the handle is in line with the steel backing along the top of the blade (which is narrower than that of the back saw).
The dovetail saw usually has about 15 points per inch.
As the name implies, this saw is designed to make the fine cuts for close-fitting wood joints, but it can also be used with a shallow miter box.
It’s cutting operation is similar to that of a backsaw.
Compass Saw
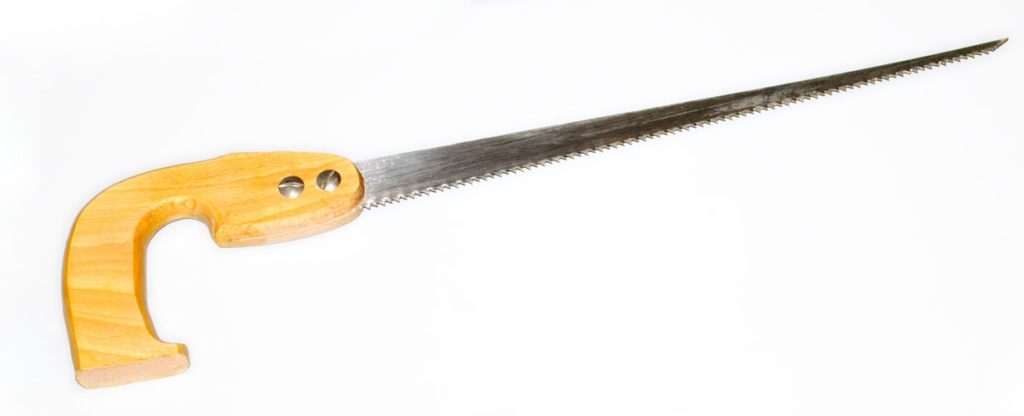
A compass saw is used for making curved or internal cuts (for example, a switch opening in a piece of paneling.
Its blade is narrower at the toe than at the heel and has 8 or 9 points per inch.
A keyhole saw is much the same as a compass saw; it is slightly smaller and has 10 or 11 points per inch, making it better suited to fine work.
Techniques for using both these saws are the same.
When you are cutting from the edge of a piece, start the saw with a few pull strokes, then take longer push strokes for cutting.
To cut curves, twist the handle to guide the blade. Since the blade is narrower at the toe, you can make tight-radius curves by shortening the strokes and using only the toe of the blade.
For internal cuts, drill a starting hole first. Then insert strokes until the kerf is long enough for full strokes to be made.
Very long inside cuts may be started with a compass saw; when the kerf is long enough, insert a crosscut of a thin fine-toothed (10 to 20 points per inch) blade held in a U-shaped metal frame.
The blade is removable and can be inserted in the frame so that it cuts on either the push or pull stroke in any direction.
Some more expensive types of blades are round, with spiral cutting edges; these will saw in any direction, making possible tight-radius curves.
To make an internal cut with a coping saw, remove the blade from the frame and pass it through a pre-drilled hole in the work; then reattach the blade to the frame for the cut.
When using a coping saw, hole the work firmly in a vise, as close to the cutting line as possible, to avoid the possibility of splitting and excessive blade twisting and possible breakage.
Tips on Saw Care
- Always keep saw blade sharp. A dull blade not only makes you work harder but may also stick or jump out of the kerf, marring the work and possibly causing injuries.
- Never allow the teeth of wood saw to come in contact with concrete, stone, or metal. Before sawing a piece of wood, examine it carefully to make sure that there are no nails in path of the cut.
- Set the saw down gently after use- never just it aside or into a toolbox where it can come in contact with other tools.
- If possible, store the saw by hanging it up where there is no chance of its teeth being damaged. If you must carry a saw in your toolbox, hold it in a special rack or compartment where the teeth are protected.
- Sharpening a saw is a skill in its own right- a time-consuming one as well. Most craftspeople prefer to leave this job to the professional who has the proper tools to do it right. Many hardware stores offer saw-sharpening services.
- It’s a good precaution to protect the saw blade by giving it a coat of paste wax. If the blade begins to rust, clean away the rust by rubbing it with fine emery cloth and Then coat the blade with light machine oil.
Hand saws are a traditional carpentry tool. Nowadays although there are different types of power saw, you will still need hand saws in your woodworking shop.
A hand saw for a woodworker is like a knife for a soldier! 🙂



Comments
Pingback: Best Woodworking Tools for Beginners | Wood Dad