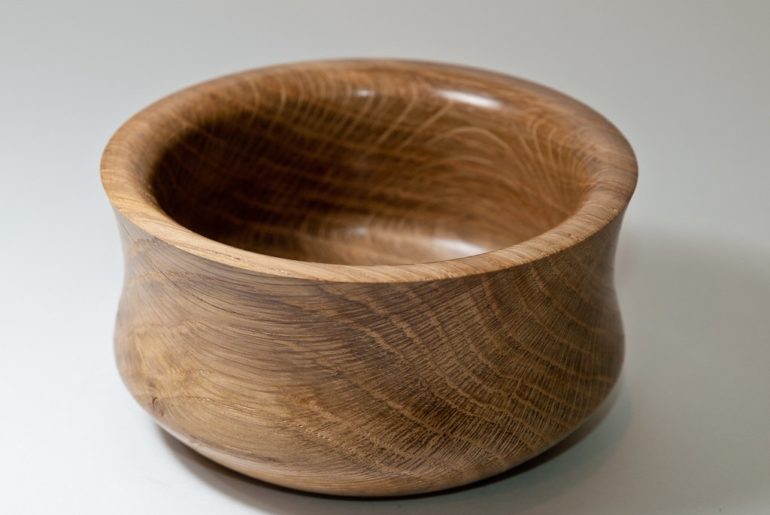
If you’re a beginner and want to turn your first bowl, this article will help you. Woodturning art is one of the thousands of arts that deals with wood. These arts each have a special aesthetic and can be made with different tools and equipment. Let’s begin to see how bowl turning works.
Bowl turning is one of the woodturning methods. In this article, we show you how to turn your first bowl and we will discuss the principles of this art that you need to create a turned bowl.
Design in Woodturning
Before you start woodturning, you must have a design. This design can include a detailed plan with all the details of the process. Your design may also include sketches drawn on a piece of paper.
Every person has a remarkable perspective which represents in the design of his work, but apart from the extraordinary mental perspectives, there are principles that are essential to any carpenters.
You should ask yourself the following questions in the initial steps:
- What is the purpose of making this project?
- Is it fully functional or fully decorative?
- Does it lie between the functional and decorative poles?
It is better to consider just one functional or decorative usage to design an object and to avoid designing an object with two functions. Because the main functionality of the object may be overshadowed and the object may become defective.
For example, consider a salt shaker, which has an artistic idea behind it but it’s unuseful. In the design, as with most woodworking steps, there is no room for trial and error, and you must specify a purpose, then design before starting the work.
Lichtenberg Wood Burning eBook

Download Lichtenberg Wood Burning eBook
One of the modern techniques for creating wooden artwork is called Lichtenberg wood Burning. In this eBook, we are going to introduce this newfound art to you.
This technique is known with some different names such as Lichtenberg wood burning, fractal wood burning, and electricity wood art.
This technique should not be confused with wood burning art or pyrography. The art of pyrography on wood is the art of creating motifs and designs by burning with hot metal tools on objects such as wooden surfaces.
Lichtenberg burning is a wood-burning technique for creating designs with electricity.
This eBook is a comprehensive guide on Lichtenberg Wood Burning. All you need to know for Lichtenberg Wood Burning is here.
This is a limited-time offer, order now to get access to the future eBook releases.
There are some things to consider:
- In designing an object, you must consider the general geometric shape of that object.
- Imagine in your mind that a finished piece must be decorative or functional.
- When designing, consider even where the object should be used.
- Keep in mind that each wood has a unique quality, so you should consider the advantages and disadvantages of wood when designing.
- To execute any woodworking plan you need to forecast the tools and techniques that will be used, so consider your own capabilities and skills to design.
You can see your progress by taking a picture of work and looking back frequently. So try to preserve and archive your designs.
Choosing Wood
There are thousands of different types of trees and shrubs that make up our wood resources. Almost all of these sticks can be used, but some are more suitable for woodturning. It is interesting to know that the most beautiful carvings can be made from inexpensive and unused timber and boards.
Discarded branches and trunks that you may see them as crap at first glance, just like Barn wood, are the other sources of wood for scrap. These include all types of old cracked, dry or wet wood, and barn wood, each with unique characteristics such as color, texture, and grain. You can show these beautiful features with woodturning art.
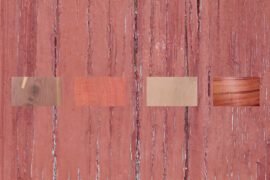
The most commonly used woods in the world are hardwoods such as walnut, maple, olive, sparrow, and oak.
Bowl Turning Method
Bowl turning is one of the woodturning methods which is mostly used for making hollow pieces such as bowls, turned wood lidded box, etc. For turning these products, one side of the workpiece must be free for hollowing.
In this way, a chuck is installed on the lathe machines instead of a headstock. One side of the workpiece is screwed to the chuck and the other side remains free. With this arrangement, the piece can be rotated and hollowed easily without the need for a tailstock.
How to Turn a Bowl
When you get a log, you can cut basic bowl blanks quickly. For this, at the first determine the diameter of the log, and then cut it down to the middle. Now you have two bowl blanks from the round log.
Reading Grain Direction
Logs cross-section is roughly circular and you just need to shave it enough to make it smooth. Most of the time we have to do the same thing. But there are 3 problems:
- The texture of the project will not be very good. Shaving the inside of the projects can become very hard.
- Polishing of work at the wood fiber direction can become harder and the roughness will not disappear.
- The color of the wood is also brighter on the outside (under the skin). Of course, this is a taste that many people might like it.
So, we should try to use timber to cut the wood longitudinally and consider the thickness needed.
You can also normally have the bottom of the bowl at the outside (bark side) of the blank since this will give you the largest bowl from the log. This is not a fast rule though and you will learn to read the grain to get the best looking bowl from your log. Remember that the part that will eventually show in the finished bowl, is somewhat difficult to see until you get rid of all that wood!
Cut Off the Edges
The next thing you should do is to cut off a little of the edges with the grain. If you don’t cut it off, you will just have to turn it away on the lathe.
Turning Your First Bowl
After these steps, you can rotate your first bowl. To do this, you need to mount the piece of wood on the machine and start with a wedge. You can use a gouge to hollow the bowl. You can use a side-ground gouge to peel away large amounts of wood shavings. To know how to do this, see the video below.
You can use a 5/8ths-inch deep fluted gouge with a thumbnail grind and the big’ un 1-inch bowl gouge with a modified regular grind to get rid of the wood. For more info see this article from uwoodcraft.com.
Safety Tips
- Before turning on the machine, make sure the wood is firmly fastened in place and will not be thrown by turning the machine on.
- Before turning on the device, rotate the workpiece to see if there is enough space for the workpiece to rotate and it does not hit to anything around.
- The distance between the tool rest and the piece should be greater than 5 cm. Of course, if the front is closer to the piece you will have better control over the tool (there are exceptions).
- Use lathe tools for bowl cutting. Working with these tools is safer and easier than the other tools.

