In this article, we are going to explain how to burn green wood. Many times we can not wait for the freshly cut wood to dry completely and we have to burn it before it dries. If you’ve gone on a picnic and camped in a wet forest, you know exactly what I mean. You will probably not find any dry wood and you will have to burn the freshly cut branches. But what to do when you are in this situation? Here’s what you need to know to burn green woods.
Living Wood and Dead Wood!
Before we get into the scientific discussion of burning green wood, let’s explain it very intimately and publicly. We have stated the subject matter in a more scientific and specialized way at the end of this article.
The important thing to know first is: A piece of wood is either alive or dead, which is quite different from whether the wood is dry or wet.
Green Wood and Seasoned Wood
A piece of wood that is alive means that there is water in its cells and it is called green wood. Not to mention, the freshly cut branches are green wood.
If the green wood is exposed to the air long enough, it will lose its cellular moisture and die, which is called seasoned wood. See Seasoned Wood, Everything You Need to Know.
With this explanation, a piece of wood can be green wood (alive with water in the wood cells) but be dry apparently and in comparison, a piece of wood may be seasoned (dead with no water in its cells) but be wet.
In other words, the apparent dryness or wetness of wood has nothing to do with the moisture content of wood and has no effect on the quality of how it burns.
Lichtenberg Wood Burning eBook
Download Lichtenberg Wood Burning eBook
One of the modern techniques for creating wooden artwork is called Lichtenberg wood Burning. In this eBook, we are going to introduce this newfound art to you.
This technique is known with some different names such as Lichtenberg wood burning, fractal wood burning, and electricity wood art.
This technique should not be confused with wood burning art or pyrography. The art of pyrography on wood is the art of creating motifs and designs by burning with hot metal tools on objects such as wooden surfaces.
Lichtenberg burning is a wood-burning technique for creating designs with electricity.
This eBook is a comprehensive guide on Lichtenberg Wood Burning. All you need to know for Lichtenberg Wood Burning is here.
This is a limited-time offer, order now to get access to the future eBook releases.
Don’t Confuse!
Scientifically a piece of wood that has been separated from a tree is considered dead because it is removed from the source of nutrients and it cannot use the energy from sunlight to grow and make more pieces of wood.
In comparison, a living wood (like a branch connected to a tree) can transform materials from the environment into energy to grow and reproduce.
With this in mind, it becomes clear that the terms “dead wood” and “living wood” above only mean seasoned wood and green wood, though scientifically these definitions are different.
Burning Green Wood
According to the explanations we have given so far, there is a lot of water in the green wood cells, which causes the green wood to produce a lot of smoke when it burns.
Therefore, burning green wood indoors will not be a pleasant experience! But burning green wood outdoors shall not be a problem.
To get a better result from burning green wood, consider the following points.
1- Smaller Pieces Burn More Easily
You have probably found by experience that smaller pieces of wood burn more easily. This is even more important when it comes to burning green wood.
So before lighting the fire, split the woods into very small pieces (as much as possible for you). Of course, you are not going to make sawdust, but know that thick branches do not burn easily and you must split them longitudinally (along the grain) with an ax or splitting maul.
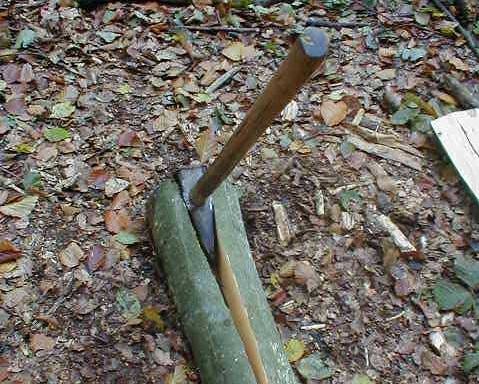
If this is not possible for you, remove them for now and place them next to the fire.
2- To Burn Green Wood, You Definitely Need a kindling
To burn green wood, you definitely need a large amount (more than normal) of kindling. Kindling is a material that burns easily and helps get a fire going. These materials (like alcohol, oil, dry branches of trees, paper) speed up the process and get a fire bigger.
What Kindling is Better?
The best Kindling for burning green wood is oil. This may be a bit unprofessional choice, but in a wet environment for burning green wood, oil is definitely the best choice. This point is very important in the wet seasons of the year.
The alcohol flame does not have much power. Things like paper will not work either. Finally, if there is no oil, you can use the dry branches of trees. Of course, the combination of dry sticks and oil is the best kindling.
3- How to stack the pieces of wood is very important
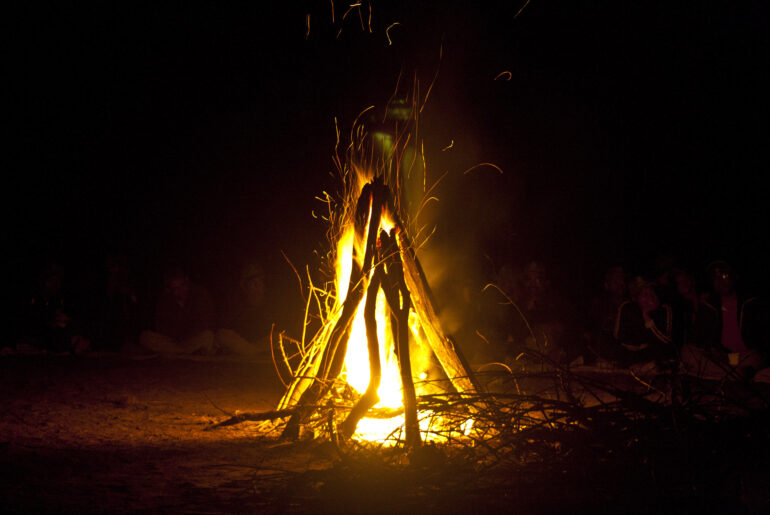
How you stack the pieces of wood is very important in delivering oxygen and creating a hotter fire. The fire that is suitable for burning green wood must be very hot, and the teepee fire is definitely the best model.
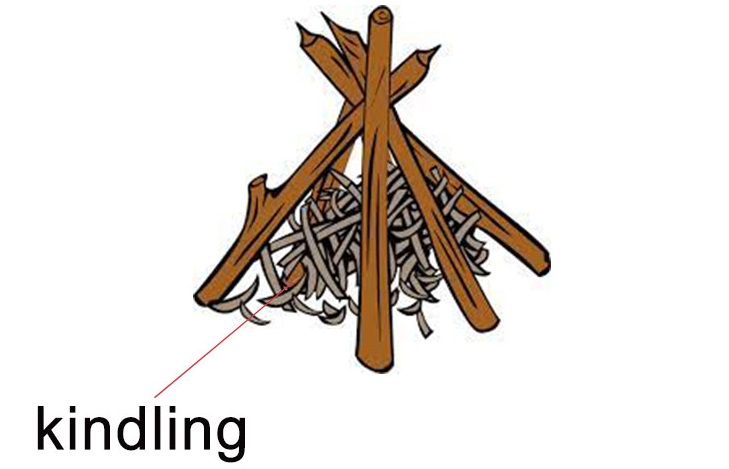
Teepee fire is a cone-shaped structure. A circular base allows for enough oxygen flow, so it burns hot and this is important for burning green wood and wet wood.
This way to build a fire is easy to feed by leaning more sticks against its upright structure. This is also very important because when old woods are ignited, new woods have a chance to lose a lot of moisture.
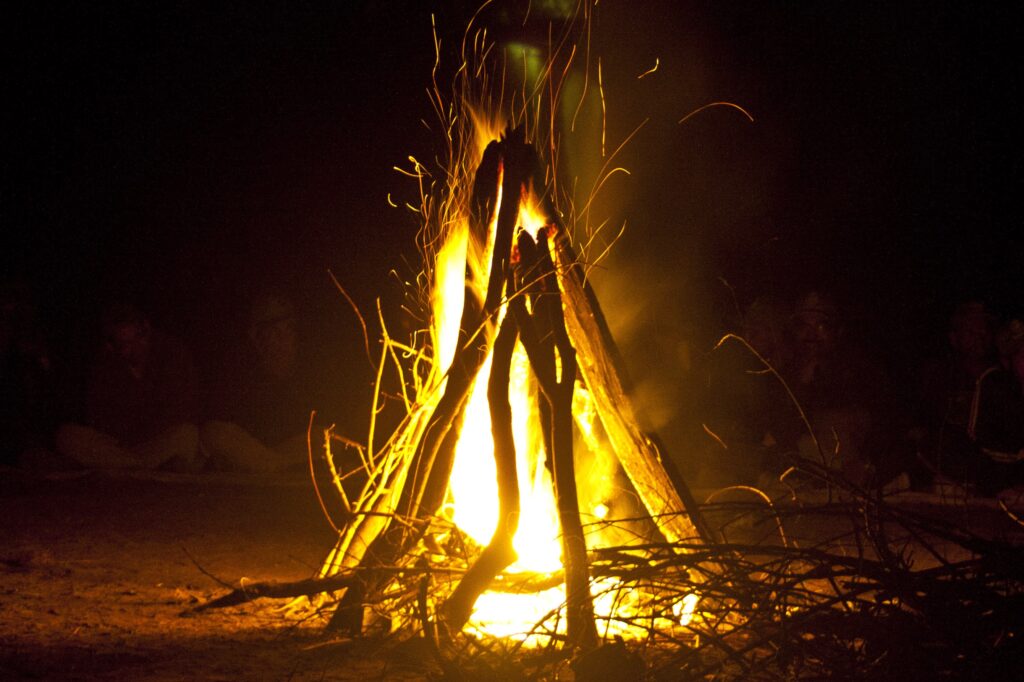
If you are planning to build a campfire for cooking, this type is definitely suitable, but If you’re looking for a fire with a sustained burn, this method is not suitable. The logical conclusion is that green woods are not suitable for creating a lasting fire unless you place them around a fire to dry and use them later.
Do not forget to place the kindling in the middle of the structure.
4- Lighting the Fire
After you stack the pieces of wood (teepee model) and mix those with kindling, now you need a tinder. Tinder can include small twigs, dry leaves, or forest duff. Light the tinder and blow lightly at the base of the fire, which will help increase the intensity of the flame and further ignite the kindling.
When the fire ignites, expect to hear lots of popping sounds. In addition, burning green wood produces thick smoke.
Moisture Contact of Green Wood
When it comes to moisture in the green wood, scientifically it is at the molecular level.
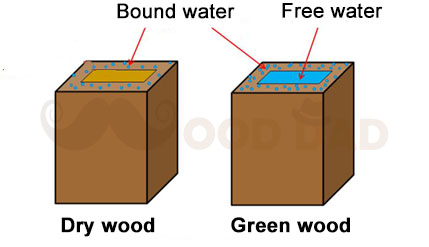
In the figure above, you can see the difference between free water and bound water in cells of green wood and seasoned wood (dry wood).
Leaving free water out of the cell cavity when burning green wood causes lots of crackling sounds.
See Everything About Moisture Content of Wood for more information.
Is it illegal to burn green wood?
This is related to the laws of your country, but as far as we know, it may be illegal to burn live trees and shrubs somewhere, but burning green wood (freshly cut wood) is not illegal.
Burning Green Leaves
This is prohibited in some areas due to the production of toxic gases and air pollution. If it is not prohibited in your area, please do not do so. With large quantities of leaves blowing around your yards in autumn, you may be tempted to resort to the old-fashioned method of burning. burning green leaves produces particulate matter and hydrocarbons which contain a number of toxic, irritant, and carcinogenic compounds.
What Wood is Toxic to Burn?
You should also note that some types of wood are toxic to burn and can be very dangerous even if used as firewood in the fireplace. If these woods are freshly cut, their toxicity will increase.
It is better to see What Wood Is Toxic To Burn before burning green wood.
Conclusion
In this article, we explained how to burn green wood and freshly cut branches. There are three things a fire needs to get started:
- oxygen
- heat
- fuel
By chopping wood into smaller pieces and proper stacking of wood (the first and third point), you are helping to deliver oxygen to the fuel more easily. Using the right fuel (the second point) will also help generate more heat to burn the green wood at the beginning of the burning process.



Comments
Pingback: How To Start a Fire When the Wood Won’t Catch – Prepsurviveandthrive.com